 FaceBook
 Twitter
 Portfolio
Signed Sealed Delivered Im Yours!!!
Well its been 2 weeks since i started work on the final designed character and its finally done.
Its been a hard time getting it working but i think i managed it quite well, the problem is that it has only left me with with 4 weeks to get the other work done, now although i feel that this is possible i dont feel that it will be showing my skills at there full.
I understand that this problem is all down to me and the way i structured myself with the project over the year but i still feel i can come out of this with a good peace of work even if i work on it after the project is over.
So as for the project that i will be submitting, i am going to be requesting to my lecturer (Chris Wyatt) in my next meeting with him if i would be able to be marked not only on the animation but also the texturing, rigging and modelling of the main character, this will hopefully get me then extra marks that i dont feel i will be able to acquire with just the animation hand in.
So as i said at the start, i've finished the rig and the rest of the character set up, here is what i have.


So As you can see from the images i have done quite a bit since the last post and i hope that now my rig is done i will still have enough time to get the animation out.
So what i did since the last post is i started by fixing the issues with the mesh that i mentioned before and then begun to rig it.
For the rig i used a small amount of reference from other rigs that have been made and tried to develop my own techniques that i felt would work.
One of the main things i found helpful was the rig from Pigeon Impossible, it used a small expression code that was placed on the visibility option that would bring up a feedback disc on the wrist to state that the arm was being pulled to far and may start coursing problems.
Expression:
cond( ctr_dist( Emile.Right_IK_Arm_Root.kine.global.pos, Emile.Right_IK_Ctrl.kine.global.pos ) > 6.9, 1, 0 )
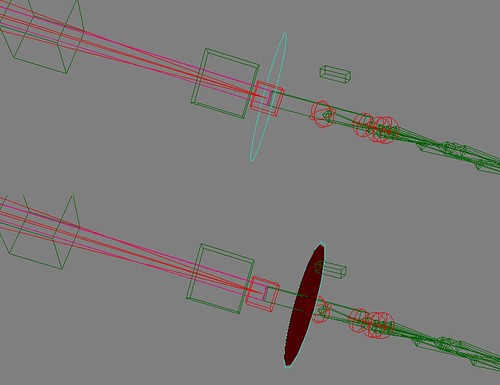
For the spine i thought of a easy way to stop the body from stretching without coursing crippling to the over all movement.
To do this i placed a 2 bone chain and parented the root to the chain to the hip object and the effector to the top vertebra.

As you can see from the last image on the right the green bone is the 2 bone chain i have mentioned. This is stopping stretching but not limiting movement as you can see from the other images.
Another useful feature i have implemented is the use of a reverse foot control. This gives the animator easier control of the foots rotation and will essentially generate smoother animation.

Before starting the final rig for this character i started by making a demo rig that used all the techniques that i thought i would need and then chose the things that i felt would be needed by Émile to preform him actions.
Some of the things i chose not to include where things such as IK/FK switch....this was done by creating a "dead bone chain" (a bone chain made of nulls) and then constraining them to the IK chain or the FK chain and using a slider to blend between the two of them......i have used the same technique as i did in the demo by making the dead bone chain and constraining them but only made an IK chain. This is so that if i feel that at any point i may need a FK chain it will be easy to make one and fit it to the rig without any enveloping or weight mapping problems.
Other things i didn't include were expression scripts that would control the visibility or objects through sliders, these were not needed due to the single IK chain but can be also easy implemented if need be.
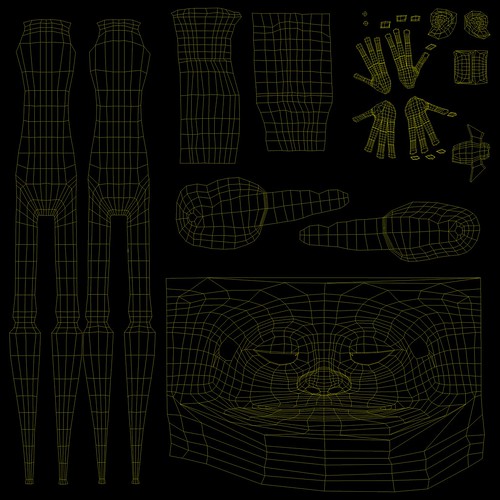
Once all the enveloping and rigging was complete i started work on the UV Mapping. As i had never done this before i found it a new and challenging experience. After i had learned the basics it become a little easier but it wasn't till work started that i begun to understand it better.
To make it easier i started with creating clusters of the main body parts for easy access to the sections when unwrapping, this helped me out a lot and i found that i didn't need to keep going back to the model and reselecting the polygons.
I had to use several projections on some sections of the body such as the feet that required 4 projections and then stitched together to create the final projection and reducing the deformation of the texture.
After the mesh was unwrapped i ended up with this....
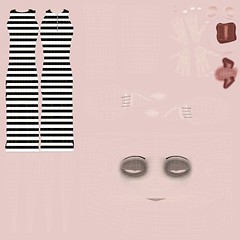
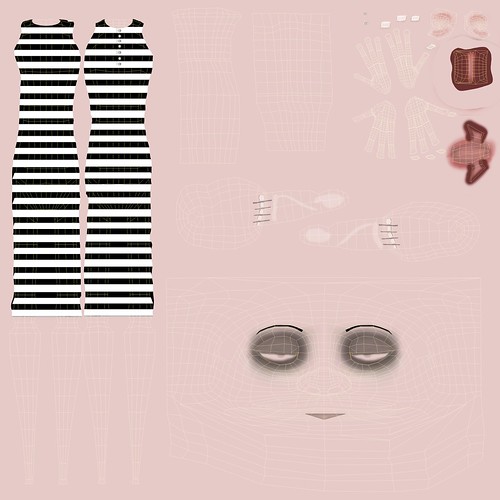
Then i moved on to coloring it in Photoshop and producing this....
one of the hardest parts i found when texturing was the eyes. This was because i wanted a specific style to them and couldn't work out a way of producing it.
some of the references i used where from Tim Burtons Corpse Bride and the Road Safety Advert.


After several different versions of the eye colors i ended up with this and i feel that it worked best for what i was wanting.

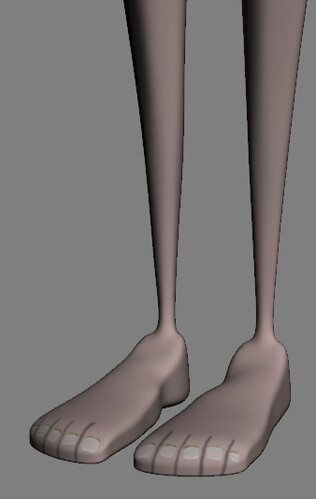
To save from having to model out the toes i also used an old game character technique where in you texture the toes as if they where there, this results in this....
Once it was all complete i finished with this character and i feel for my first fully textured and rigged biped character i did a great job of it.


Well that's all for this post. I hope you enjoyed reading it as much as i enjoyed writing it. I hope you got something from it also.
I hope to have a meeting soon with my mentor to discuss the marking as mentioned earlier in the post, so keep tuned for that and i will speak to you soon.
PS. please leave a comment and let me know what you think i would love the feedback.
Thank You.

0 Comments